How to find a stud without a stud finder
There are four reliable methods and one that does not work. Start at an outlet, measure in sixteens, confirm with a magnet, and only then put a hole in anything.
Top pick
Franklin Sensors ProSensor M150 9-Sensor Stud Finder
Nine sensors and fifteen LEDs read the wall in one placement and light up over the whole stud, so you see its full width immediately. No calibration, no sweeping, no second guess.
#ad we may earn a commission · price as of November 13, 2026
Scored 9.5 · Finding the stud first time. The full ranking and the runners-up are below.
Quick picks
Our ranking at a glance. Tap any row for the full write-up, or the price to go straight to Amazon. Scores are ours, weighing published specs, the design and what owners report after a year — the method is published in full.
| # | Product | Best for | Score | Price |
|---|---|---|---|---|
| 1 | 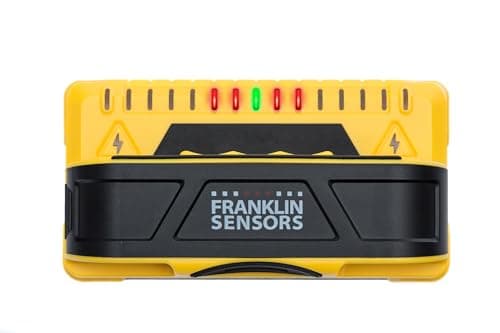 Franklin Sensors ProSensor M150 9-Sensor Stud Finder Finding the stud first time | Finding the stud first time | 9.59.5 out of 10 on our Beginner-friendly, Value, Durability, Stores small scoring | |
| 2 | 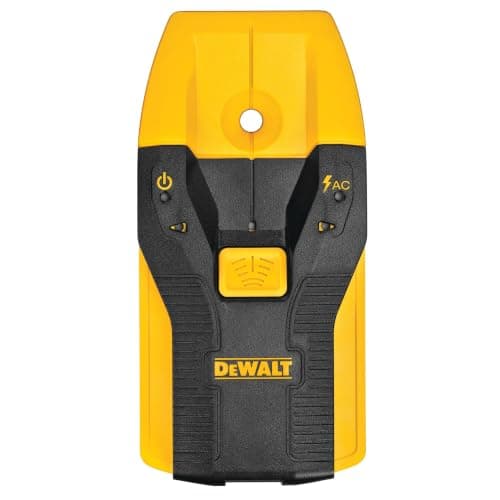 DEWALT Stud Finder with LED Arrows Fifteen dollars that works | Fifteen dollars that works | 9.59.5 out of 10 on our Beginner-friendly, Value, Durability, Stores small scoring | |
| 3 | 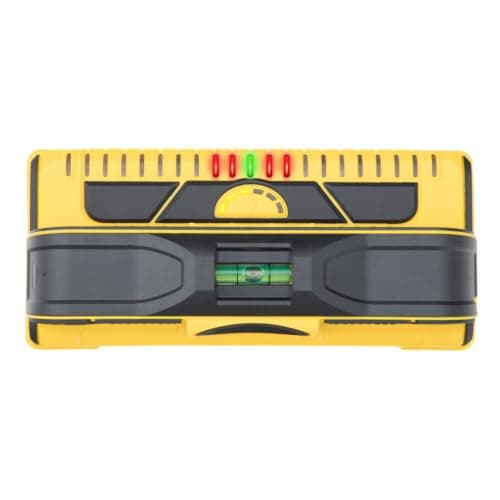 Franklin Sensors ProSensor M210 13-Sensor Stud Finder Thick or awkward walls | Thick or awkward walls | 9.39.3 out of 10 on our Beginner-friendly, Value, Durability, Stores small scoring | |
| 4 | 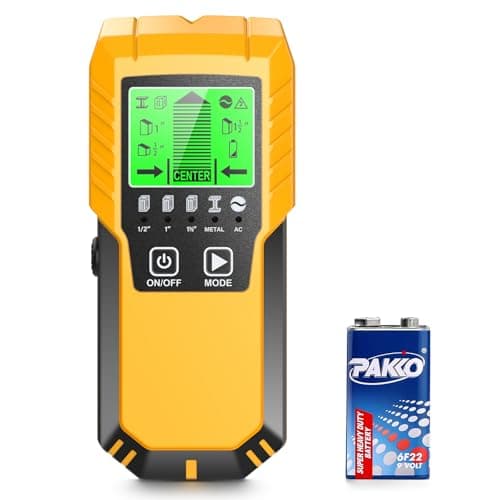 Povlen Stud Finder Wall Scanner, Wood/Metal/AC Pipes and cables as well as studs | Pipes and cables as well as studs | 9.39.3 out of 10 on our Beginner-friendly, Value, Durability, Stores small scoring |
#ad — Amazon links on this page are affiliate links. How this site is funded.
Start at an electrical outlet or light switch: the box is nailed to the side of a stud, so there is timber immediately beside it. Studs in US construction are usually 16 inches apart on center, so measure 16 inches along and you are on the next one. Confirm with a small magnet, which will stick to the drywall screws running down the center of the stud. That sequence — outlet, 16 inches, magnet — finds a stud without buying anything.
The reason this works is that drywall is not hung at random. It is screwed to a frame on a fixed spacing, every outlet box is fixed to that frame, and the screws are steel. Each method below reads one of those three facts, and used together they agree with each other — which is the actual test of whether you have found a stud.
Scores above weigh published specifications, the design and consistent owner-reported experience over time. See how we pick.
The four methods that work
- Start at an outlet or a switch. Electrical boxes are fixed to the side of a stud, almost always the left in US framing but check both. Put your hand flat beside the plate and you are within an inch of timber. This is the only method that gives you a starting point rather than a guess.
- Measure in sixteens. Studs are usually 16 inches on center, sometimes 24 in newer or lighter construction. From a known stud, measure 16 inches along the wall and mark; if the magnet finds nothing, try 24. Corners and the edges of door openings also have timber, because something has to carry the frame.
- Use a magnet. A small neodymium magnet — a fridge magnet is usually too weak — dragged slowly across the wall will catch on the drywall screws, and those screws run in a vertical line down the center of each stud. Two hits in a vertical line is a confirmed stud. This is the most reliable no-tools method there is.
- Knock, as a cross-check only. A hollow sound between studs and a duller, tighter sound over one. It is real, it is also the least precise method here, and it is useless on plaster or over a wall with insulation pressed against the back of the board. Use it to confirm, never to decide.
| Method | What it gives you | How much to trust it |
|---|---|---|
| Outlet or switch box | A guaranteed stud within an inch, and a starting point | High — the box is physically nailed to the stud |
| 16 in on center | The next stud, from a known one | High in standard framing, lower in older or remodelled walls |
| Magnet on drywall screws | The center line of a stud, confirmed by two hits | Highest of the no-tool methods |
| Knuckle test | A rough idea of hollow versus solid | Low — fine as a cross-check, never on its own |
| Phone 'stud finder' apps | Usually nothing useful | None for drywall screws; a phone magnetometer is not built for this |
The method that does not work
Phone apps. A smartphone has a magnetometer for the compass, not a sensor designed to discriminate a drywall screw from the metal in your desk, and the apps that claim to find studs are reading the same compass. A $4 magnet outperforms every one of them, and so does looking at the outlet.
The other thing that does not work is the thing people actually do: drilling a test hole and trying again an inch over. Three exploratory holes are more damage than the fixing you were trying to hang, and in a rental they are deposit money.
When guessing is not good enough
Methods above are fine for a picture, a small shelf or a curtain rod. There are three cases where they are not, and all three are the reason stud finders exist:
- Anything heavy, and especially a TV. A mount must be lagged into the center of the studs, not the edge, and “near enough” is how mounts come off walls. Both edges of the stud is the information you need, which is what a multi-sensor finder shows in one placement. See tools to mount a TV.
- Drilling near a kitchen or bathroom wall. Pipes and cables live where the plumbing and the outlets are. A scanner with a metal and live-wire mode is the only way to know before the bit goes in, and OSHA’s electrical guidance is blunt about working near energized conductors.
- Plaster, lath or double drywall. The magnet trick fails on lath nails everywhere, and the knuckle test fails completely. A deeper-scanning finder is the honest answer in an older house.
When there is no stud where you need one
Half the time the answer is not to find a stud at all. Three renter-friendly options, in order of load:
- Adhesive hanging strips. Rated to a stated weight by the manufacturer, leave no hole, and come off cleanly. The right answer for pictures and light decor — full detail in how to hang things without damaging walls.
- Drywall anchors, matched to the load. A toggle or self-drilling anchor carries real weight in hollow drywall, and the packaging states the rating. Honour the rating rather than the optimism.
- Move the fixing. The cheapest fix of all: shift the shelf four inches so it lands on timber. Nobody has ever noticed a shelf being four inches left of where it was planned.
And if you would rather just own one
- The one to buy: a multi-sensor finder that shows both stud edges in a single placement with no calibration routine. It removes the sweeping-and-guessing that makes cheap finders frustrating.
- The cheap one that works: an LED-arrow finder for occasional picture and shelf hanging, where roughly the right spot is enough.
- Plaster or an older house: the deeper-scanning 13-sensor version.
- Drilling near pipes: a multi-mode scanner with metal and AC detection.
The full ranking is the best stud finders for home use, and if you are buying tools from scratch, the tool kit guide covers the dozen things that matter.
The short version
- Start at an outlet or switch — the box is nailed to the side of a stud, so there is timber beside it.
- Studs are usually 16 inches on center in US framing, sometimes 24 in newer construction.
- A small neodymium magnet finds the drywall screws running down the center of a stud; two hits in a vertical line confirms it.
- The knuckle test is a cross-check, not a decision, and phone stud-finder apps do not work.
- Three exploratory drill holes do more damage than the thing you were hanging.
- For a TV, a plaster wall, or drilling near plumbing, buy a finder — guessing is not good enough.
The picks in detail
#ad we may earn a commission · price as of November 13, 2026
#1 · Finding the stud first time
Franklin Sensors ProSensor M150 9-Sensor Stud Finder
Nine sensors and fifteen LEDs read the wall in one placement and light up over the whole stud, so you see its full width immediately. No calibration, no sweeping, no second guess.
- Beginner-friendly
- 9.7
- Value
- 9.1
- Durability
- 9.6
- Stores small
- 9.2
What we like
- Dramatically more reliable than single-sensor finders, which is the whole point
- Shows stud width, so you can center a screw properly
- Live-wire warning before you drill into a cable
Good to know
Twice the price of a basic finder
Specifications
- 9 sensors and 15 LEDs read the wall in a single placement — no sweeping
- Shows both stud edges at once — no edge-finding routine
- AC live-wire warning
- No calibration step; place it flat and press
Who it is for
Anyone hanging a TV, heavy shelf or mirror. Getting this wrong costs more than the tool.
#ad we may earn a commission · price as of November 13, 2026
#2 · Fifteen dollars that works
DEWALT Stud Finder with LED Arrows
A single-sensor finder done properly: LED arrows point toward the stud instead of leaving you to interpret a beep. The best of the cheap finders.
- Beginner-friendly
- 9.4
- Value
- 9.7
- Durability
- 9.3
- Stores small
- 9.7
What we like
- Arrows are far clearer than a bare beeper
- Fits a pocket or a small tool kit
- DEWALT build quality at a low price
Good to know
Needs calibration on blank wall each time
Specifications
- 3/4 in scan depth
- LED directional arrows
- Detects wood and metal studs
- Compact, pocketable
Who it is for
Occasional picture and shelf hanging where you only need roughly the right spot.
#ad we may earn a commission · price as of November 13, 2026
#3 · Thick or awkward walls
Franklin Sensors ProSensor M210 13-Sensor Stud Finder
Thirteen sensors and deeper scanning for plaster-and-lath or double-drywall walls, where the M150 starts to struggle.
- Beginner-friendly
- 9.6
- Value
- 8.8
- Durability
- 9.6
- Stores small
- 9.0
What we like
- Handles thick plaster and double drywall
- Widest read span here
- Still no calibration routine
Good to know
Most expensive by a wide margin
Specifications
- 13 sensors, wider span
- Deeper scan than the M150
- AC live-wire detection
- Same no-calibration operation
Who it is for
An older house with plaster walls.
#ad we may earn a commission · price as of November 13, 2026
#4 · Pipes and cables as well as studs
Povlen Stud Finder Wall Scanner, Wood/Metal/AC
Scans for metal pipe and live cable as well as timber, which is the safer tool if you are drilling somewhere you suspect plumbing.
- Beginner-friendly
- 9.2
- Value
- 9.4
- Durability
- 9.1
- Stores small
- 9.6
What we like
- Metal mode finds copper pipe before you drill into it
- LCD shows mode and depth clearly
- Reasonable price for the modes
Good to know
Requires calibration per scan
Specifications
- Multiple scan modes: stud, metal, AC wire
- LCD display with depth indication
- Audible and visual alerts
- Battery powered
Who it is for
Drilling near a kitchen or bathroom wall where pipes are likely.
Our recommendation
If you read nothing else on this page, this is the short version.
Buy this one
Franklin Sensors ProSensor M150 9-Sensor Stud Finder
Anyone hanging a TV, heavy shelf or mirror. Getting this wrong costs more than the tool.
#ad we may earn a commission · price as of November 13, 2026
Or this one, if Franklin Sensors ProSensor is not the fit
DEWALT Stud Finder with LED Arrows
Occasional picture and shelf hanging where you only need roughly the right spot.
#ad we may earn a commission · price as of November 13, 2026
Common questions
How do you find a stud without a stud finder?
Start at an electrical outlet or light switch, because the box is nailed to the side of a stud. From there measure 16 inches along the wall, which is the standard stud spacing in US construction, and confirm with a small magnet — it will catch on the drywall screws running down the center of the stud. Two magnet hits in a vertical line is a confirmed stud.
How far apart are wall studs?
Usually 16 inches on center in US construction, sometimes 24 inches in newer or lighter framing. There is also timber at corners, beside door and window openings, and alongside every outlet box — which is why an outlet is the best place to start looking.
Does the magnet trick really work for finding studs?
Yes, and it is the most reliable method that costs nothing. Drywall is screwed to the studs with steel screws in a vertical line, and a small neodymium magnet dragged slowly across the wall catches on them. A weak fridge magnet usually will not. It does not work on plaster and lath, where there are nails everywhere.
Do phone stud finder apps work?
Not usefully. A phone has a magnetometer for the compass, not a sensor designed to tell a drywall screw from any other metal nearby, and the apps built on it are unreliable enough that you cannot trust the result before drilling. A four-dollar magnet beats all of them.
Can you hang a TV without finding the studs?
No. A TV mount has to be lagged into the center of the studs, and the difference between the center and the edge is the difference between a mount that holds for years and one that pulls out of the drywall. This is the job where a multi-sensor finder that shows both stud edges in one placement earns its price in a single use.
What do you do when there is no stud where you need one?
Three options, by load: adhesive hanging strips for pictures and light decor, a drywall anchor matched to the stated weight rating for anything heavier, or simply moving the fixing a few inches so it lands on timber. The last one is free and nobody ever notices.
Sources
Read next
- Best stud finders for home useThe full ranking, if you would rather own one.
- How to hang things without damaging wallsWhat to do when there is no stud to hit.
- Tools to mount a TV on the wallThe one job where guessing is not an option.
- Best tool kits for new homeownersThe dozen tools a first home needs.
- Franklin ProSensor M150 reviewThe multi-sensor finder in detail.